
CRM integrations using API for developers
The goal of integrating JivoChat with a CRM system is to save data from JivoChat into the leads/customer section of your CRM and also to show updated information (e.g. visitor contact info, lead details, account balance, etc.) in the JivoChat agent’s application (a.k.a. the application where JivoChat users receive chats from their customers).
To activate an integration, all you have to do is insert an Endpoint URL from your CRM or server in the settings of the channel where you want to activate the integration. After inserting it, we'll automatically start sending Webhooks to the specified URL containing all information about new conversations from that channel.
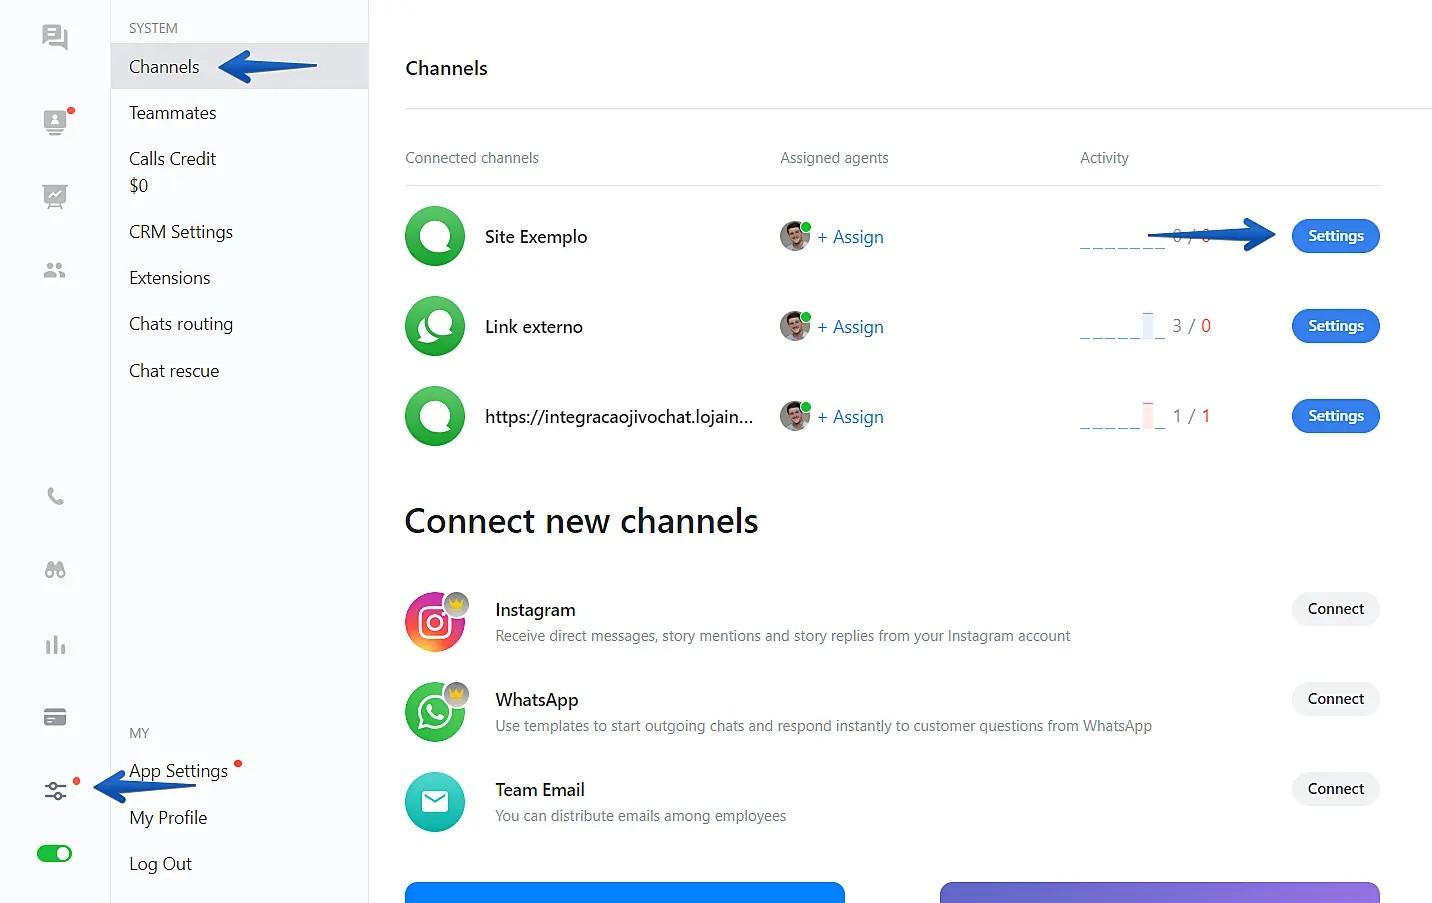
To insert a URL to receive Webhooks, access the JivoChat web app or one of our Desktop apps and go to Manage -> Channels -> Settings (below a channel name).
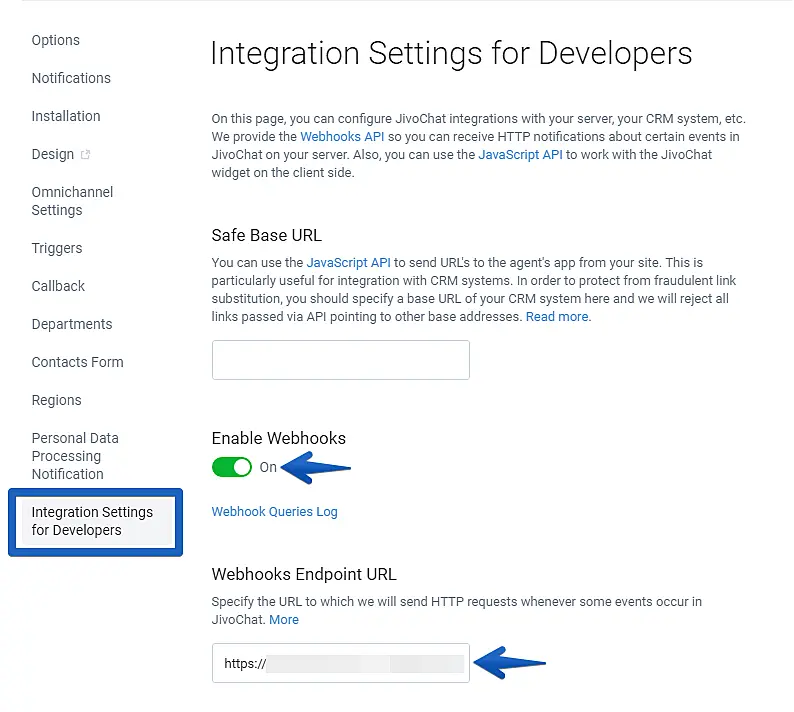
Next, enter the menu "Integration Settings for Developers", activate the option "Enable Webhooks" and insert your Endpoint URL in the "Webhooks Endpoint URL" field.
That's it! From now on, JivoChat will automatically send all webhooks from new conversations to the specified URL.
The JivoChat system sends an HTTP POST request to the specified URL in such cases:
- chat_accepted - Agent accepted chat request in the app
- client_updated - Visitor’s contact data has been updated (either the visitor provided this info on their own or it was edited by an agent)
- chat_assigned - A chat was connected to CRM
- chat_finished - Chat is finished (conversation was ended either by clicking the ‘x’ in the application or automatically by timeout after the visitor has left the website)
- chat_assigned - Agent manually assigned a visitor to the customer’s CRM record by clicking ‘Link to CRM’ and pasting a link
- offline_message - An offline message was sent while the agents were offline
What data is transferred#
You can use our documentation on https://www.jivochat.com/docs/
Main data that JivoChat sends:
- Chat ID
- Name, e-mail, and phone number
- Client ID - Note: we identify visitors by cookie, not IP
- Comment – In the application you can set a comment about the visitor
- ID, Login and Name of Agent that chatted with the customer – You can use this information to create a lead or customer account in your CRM. If the chat was transferred between agents, you will get an array with all the agents data.
- All of the chat messages with timestamps
JivoChat can receive responses from your CRM system with the following data:
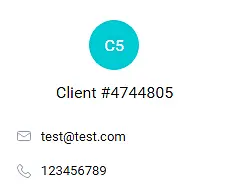
- Full contact information of your customers/leads if their specified email or phone already exists in the JivoChat system. For example if visitor gave their email during a chat, your CRM can answer with the visitor’s name, phone number and comment and have it auto-fill in the contact info fields of JivoChat.
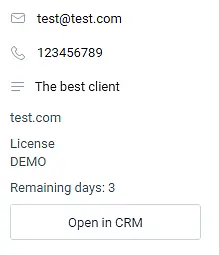
- Any custom data, e.g. visitor’s balance, current license, any other information and a link to their account page in your CRM:
- We send many detailed info such as visit source, IP, city, current page, etc. You can send any data from the JivoChat visitor details page to your CRM. For example: if a user is logged on a website, or sends some ID like their Google Analytics user ID, it is possible to send this information by using the method jivo_api.setUserToken – just call it like it's written here:
function jivo_onLoadCallback(){
	jivo_api.setUserToken("a link | id | any data");
}
JivoChat doesn’t process the user_token and it won’t show anywhere, it will just transfer all of it’s data to your CRM.
How to receive data from JivoChat on your server side#
The JivoChat webhook request is an HTTP request with POST method to specified URL. Request body is a JSON object with all data that you can find in the documentation. Here is an example in PHP for how to get a request and save it in a log file:
<?php
$fp = fopen('/request.log', 'a');
fwrite($fp, file_get_contents('php://input'));
fclose($fp); ?>
Of course it doesn’t mean that you should use a text file to keep all data. It is just an example that can be used to check how it works and how our request looks like. Next you should parse this data, push it into your base, search for a lead record and so on. After that, your CRM should send a response with the customer’s data in the object like it is described in the documentation. You can use just something like the echo function in PHP, without any additional HTTP headers.
Here is what a response looks like:
{"result":"ok","custom_data":[{"title":"Answer","content":"42"},{"title":"Last chat","content":"27 Sep 2016 19:37:12"}],"contact_info":{"name":"John Doe","phone":"+79500123567","email":"johny1337@jivoteam.com","description":"Visitor comment"},"enable_assign":true,"crm_link":"http:\/\/mycrm.ru\/user\/1"}
And from in a browser:
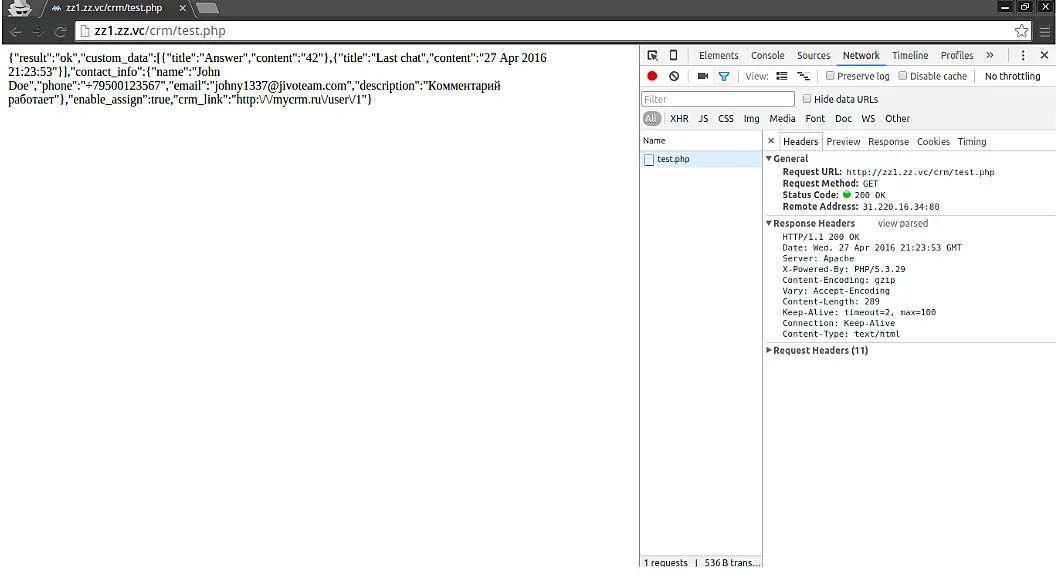
What does integration should do?#
This is what users are usually expecting from integrating with a CRM system
Once your CRM is contacted by the JivoChat system (either when a chat_accepted or chat_updated event happens) it should look for that customer in your CRM and if a customer with the specified contact information exists, then your CRM should populate the rest of that customer’s full data into JivoChat and also insert a link back to that customer's profile in your CRM. If that customer doesn’t exist in your CRM, a new customer/lead account should be created for them automatically by the known data that JivoChat sends to your CRM.
Lead record creation
- Some CRM systems have not only Lead name, but also Lead title. It can be something like JivoChat #18 - Tom Clifton
- A very important thing is to assign a manager. It is better to assign a manager with the same JivoChat login as a CRM login or some default person.
- Specify a Lead source: JivoChat. It is useful to find leads who came from a chat.
- Show visit source and a page where chat has started. JivoChat doesn’t send it in webhooks, but if it is possible, use setUserToken. The CRM and chat users want to know what channel their lead came from. It is perfect if utm marks are known and shown.
- Add a description or comment about the visitor, useful for managers or other staff.
- Some CRM systems require you to fill some fields to add a Lead. Please check what is happening if those fields are empty.
- When offline message are sent, the CRM system should create a task or email with a responsible manager to process this request. Or just add a Lead.
- Save a conversation in a Lead record. In Notes or feed.
Please pay attention to data priority. What data will be recorded or deleted? If a user introduced themselves in a chat and specified email address A and phone number B, but in CRM there is a lead with email A and phone number C. What number should be saved, oldest or newest? It is probably more desirable if the CRM has fields for additional phones and emails.

