
How to install the chat code on Ecwid
Method 1. Installation using JivoChat module
This method is suitable only for Ecwid accounts with a purchased license.
If you have a free Ecwid account, use Method 2 instead.
1. If you already have a JivoChat account, proceed to the second step. If you don't have an account yet, you'll need to create a new account using this following article as a guide: link.
2. Log in the Ecwid control panel and go to Apps -> App Market. Find "JivoChat Omnichannel Suite" in the list of available apps or search for "jivo" and click on our application.
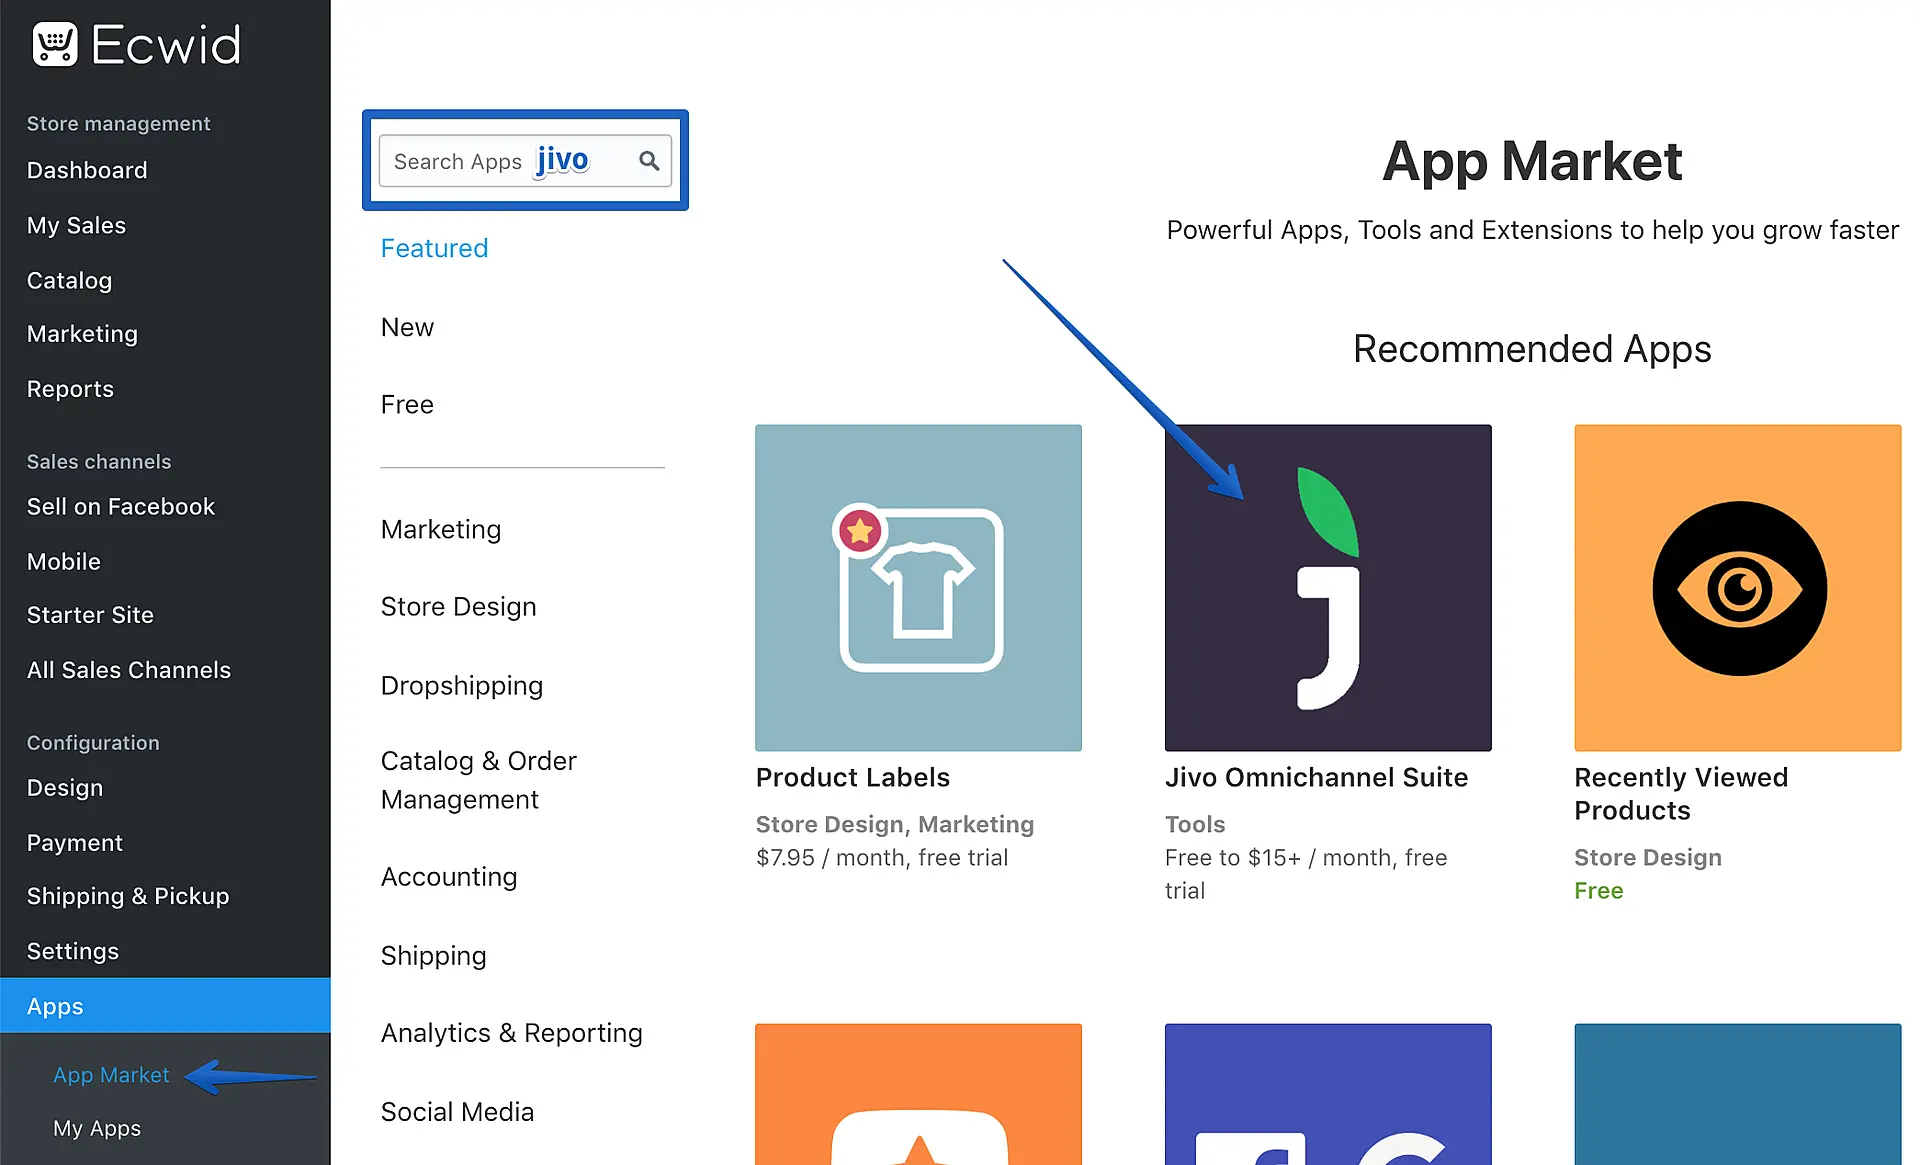
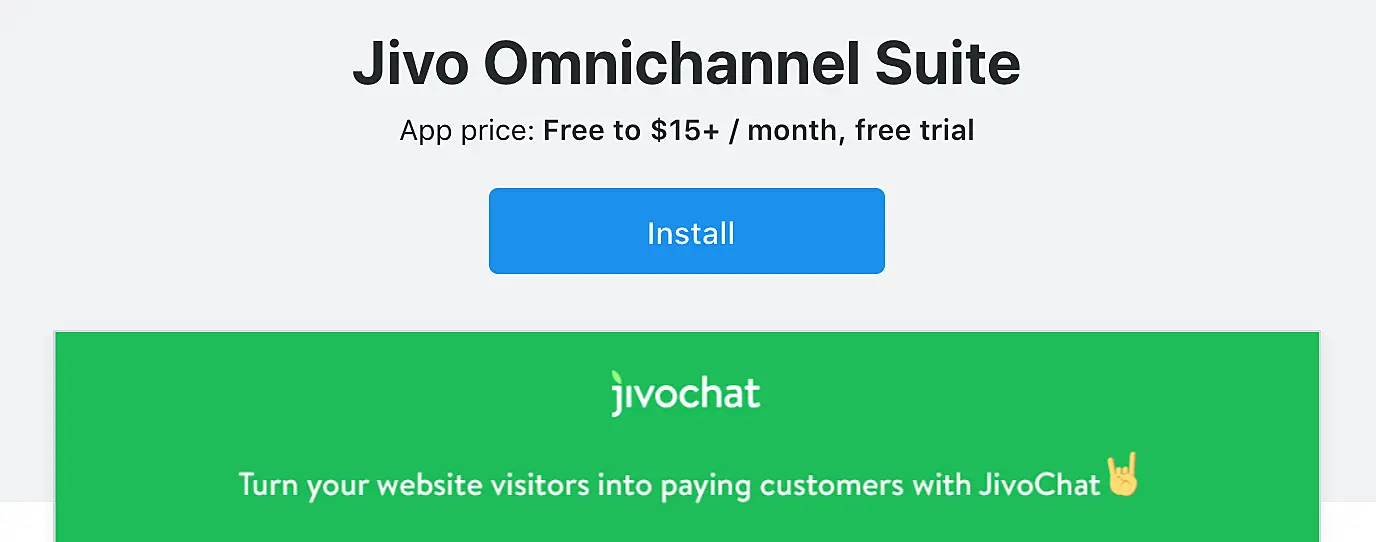
3. On our app page, click the "Install" button.
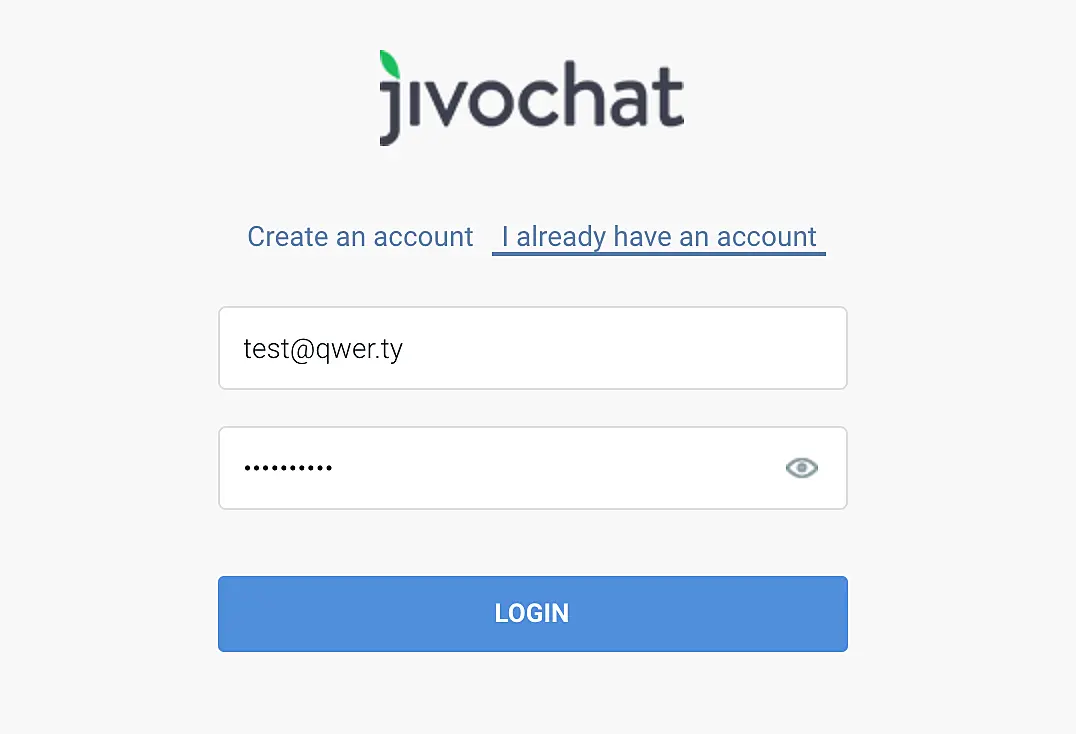
4. Next, insert your JivoChat login and password and press "Login".
That's it, the chat is now successfully installed on your website, and you were redirected to the JivoChat web app, where you can adjust the chat settings to your needs.
Method 2. Installation with the JivoChat code
Suitable for free Ecwid users.
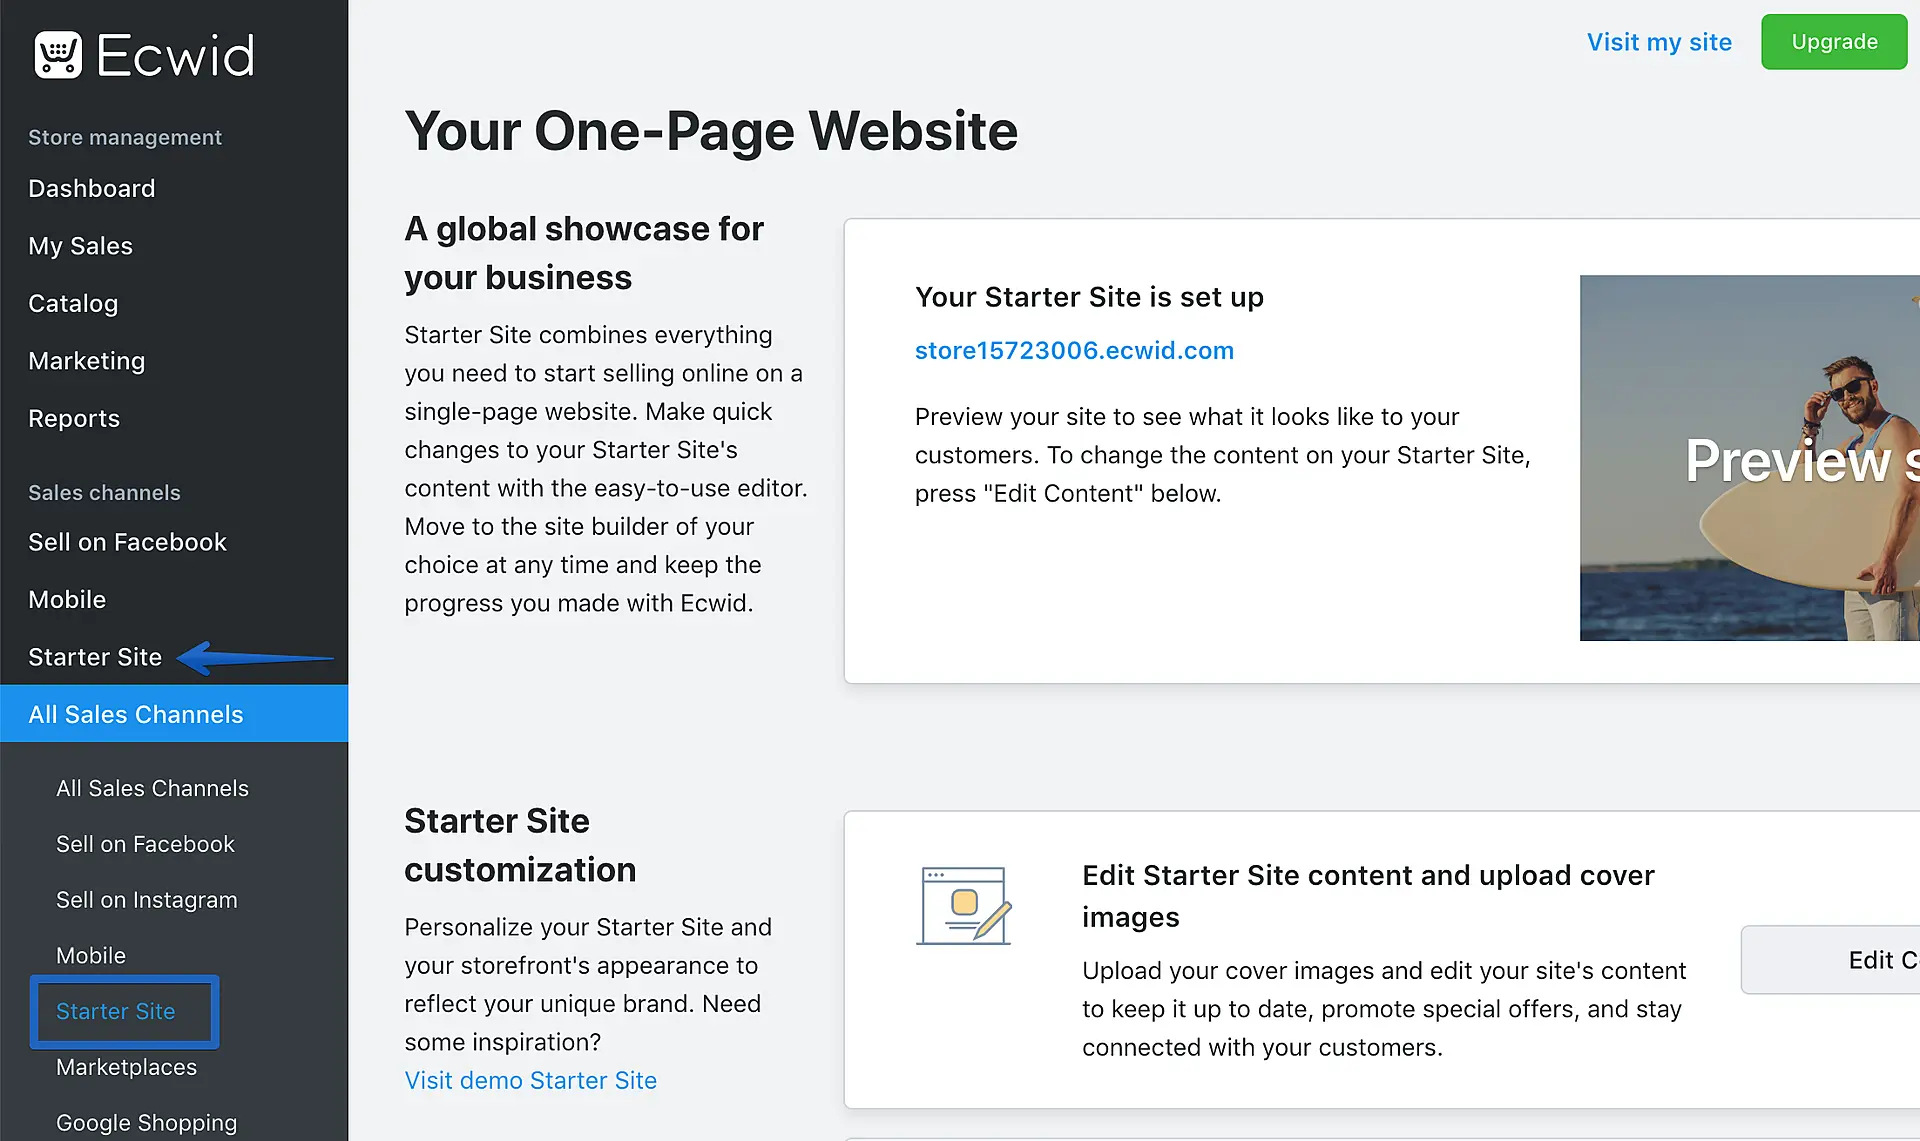
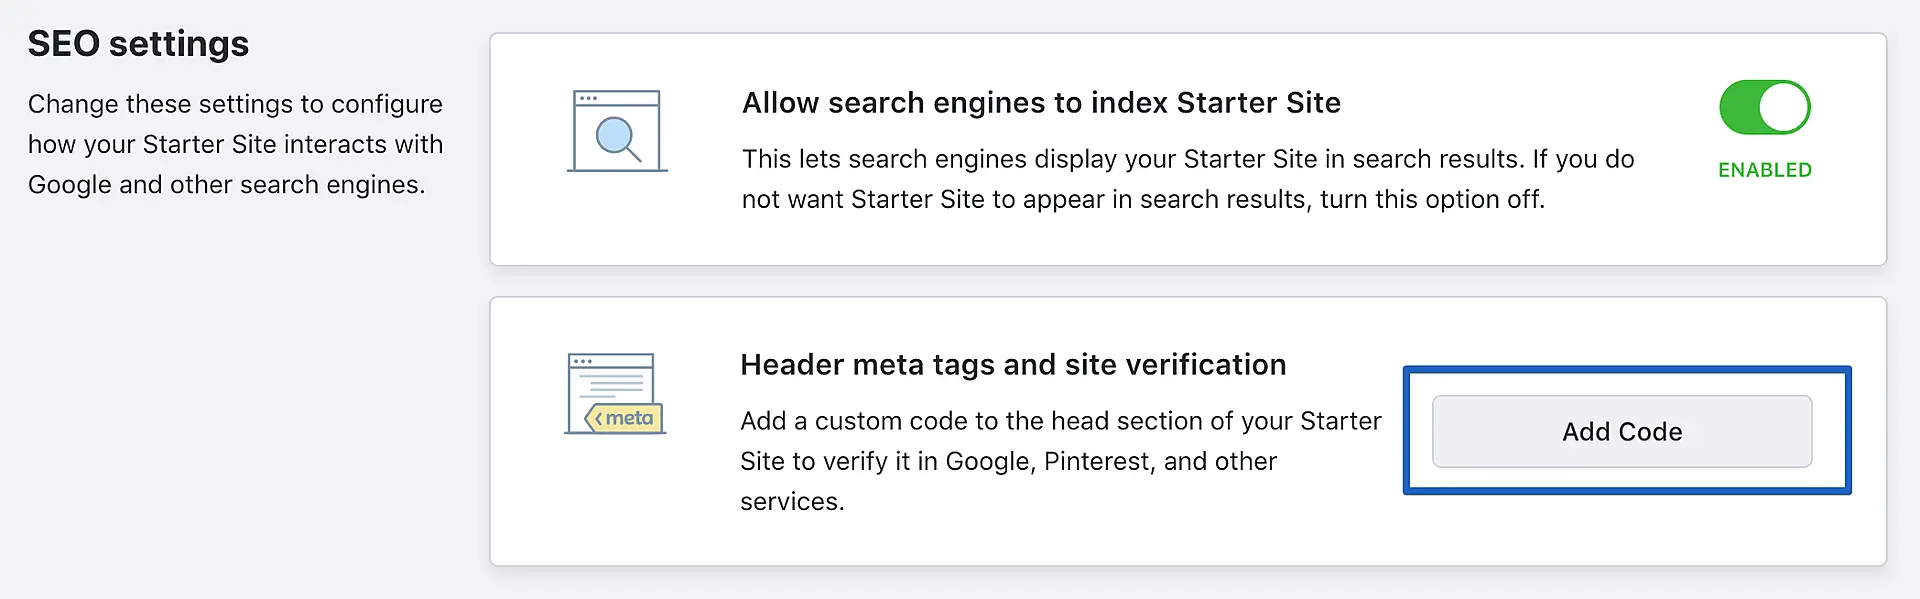
1. Open your Starter Site and scroll down to SEO settings.
2. Press the "Add code" button.
3. Paste the widget installation code in the Header meta tags field.
The code is available in the JivoChat app at: app.jivosite.com or our Desktop apps -> Manage -> Channels -> Settings (below your website channel) -> Installation.
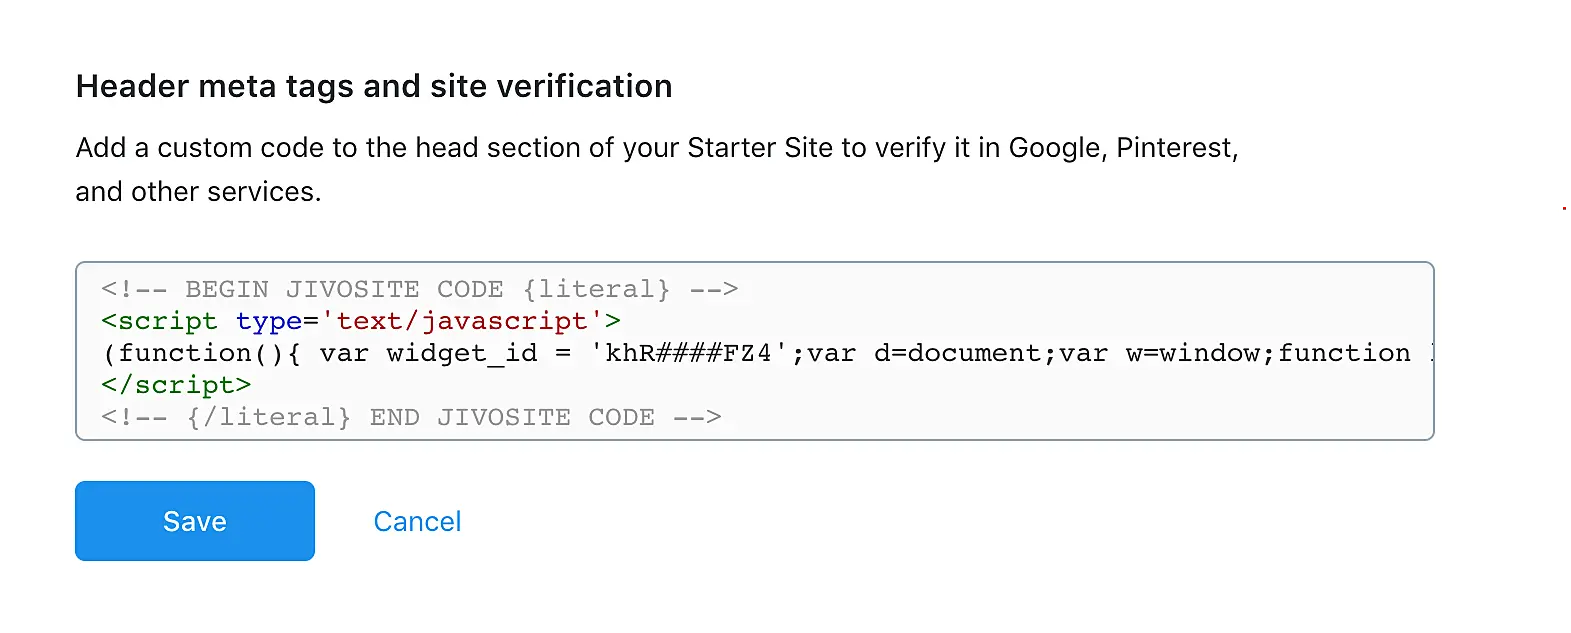
Tip: don't worry if you have some other scripts already installed in the Head tag. It's possible to install more than one script as long as each of them are inserted on a separate line. You should place the JivoChat code below the other scripts.
After pressing the "Save" button, the chat will be added to your website.
Thank you for choosing JivoChat, we wish you a productive day!

